Installing a certificate on your Synology so you don’t have the worrisome messages about an unsecure Synology landing page isn’t that difficult. But I didn’t find much content on getting this done with a Microsoft certificate authority so I thought I would write one!
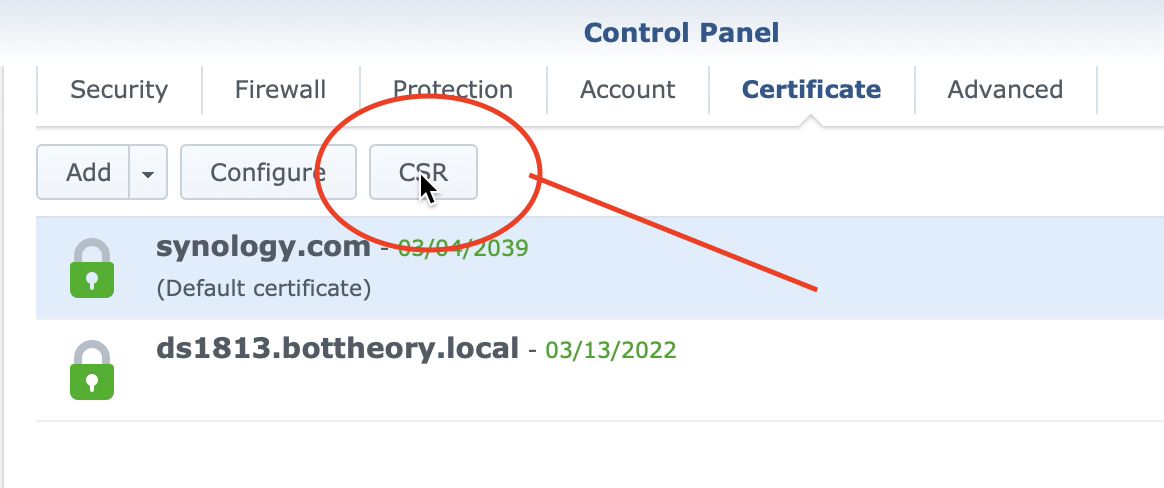
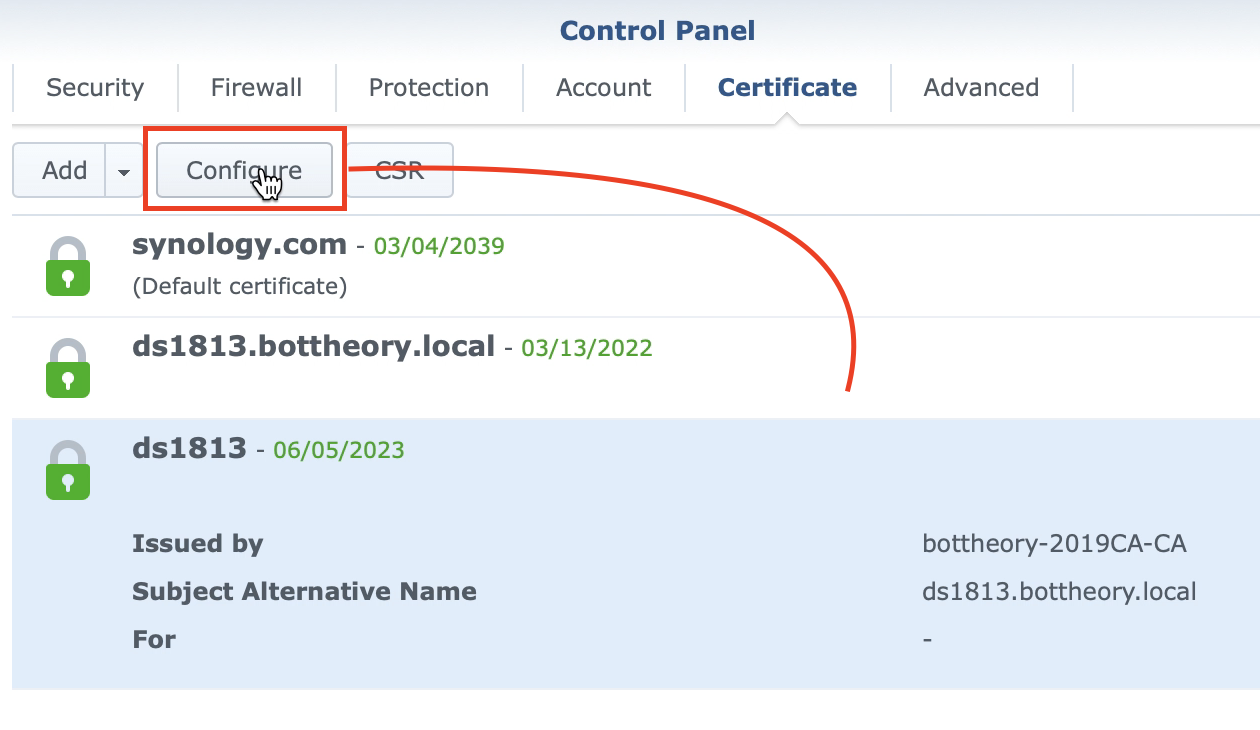
The first step is generating your certificate. In the Synology interface, open the Control Panel, select or search for Security and click on “certificate” in the button bar.

Click the CSR button to bring up the certificate signing request dialog.
Fill out the request and click Next. A file (archive.zip) will download. Leave it, we’ll get to it in a bit.

Now we need to configure our CA to allow for creating subject alternative names (SAN) in the Microsoft Certificate Authority Web Certificate Enrollment page. Terence Luk has a great page that links to some MS articles going over the security concerns of enabling this feature.
The gist of configuring your CA is pretty straight-forward. Run a single command and then restart the certificate authority service. To do so, RDP into your CA, start an elevated command prompt, then run the following:
certutil -setreg policy\EditFlags +EDITF_ATTRIBUTESUBJECTALTNAME2
net stop certsvc
net start certsvc
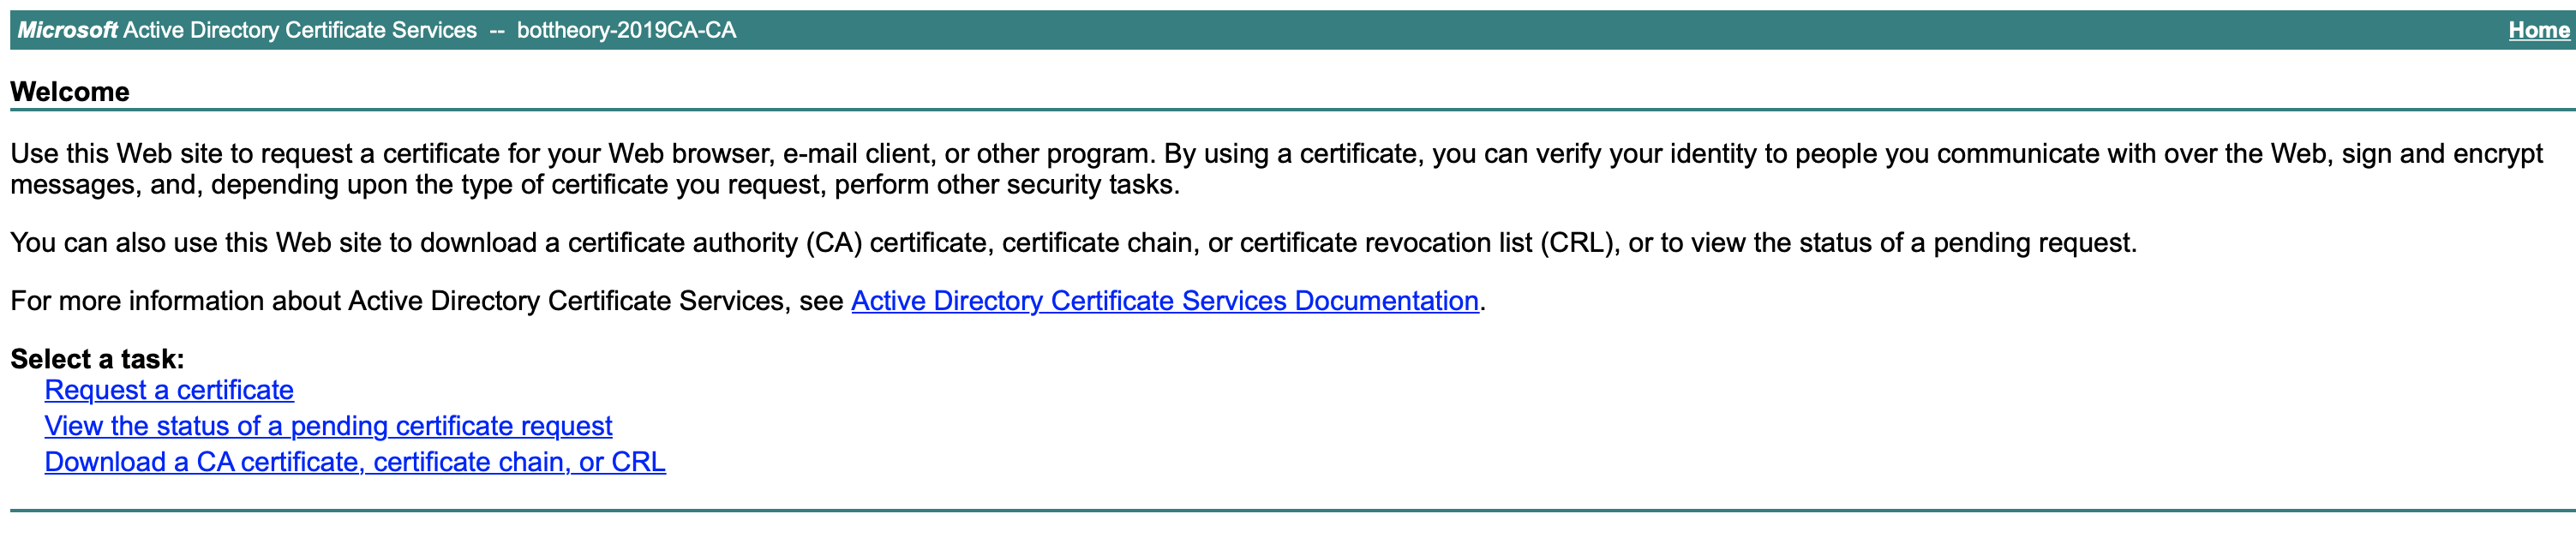
With that configured, we browse to the web enrollment page. This will be “https://%CAServer%/certsrv”
On the main splash page select ‘Request a certificate’
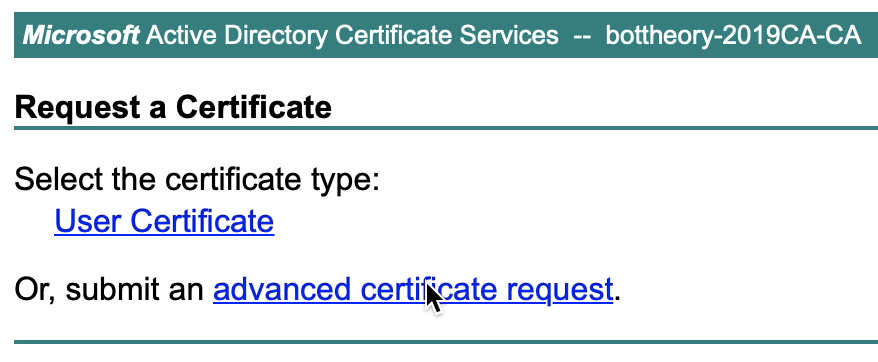
Choose ‘advanced certificate request’
Now, extract the certificate request (archive.zip) you downloaded from earlier. In that archive.zip is two files, a server.csr and a server.key. Open the server.csr in notepad or some text editor and select the whole text and copy it.
Go to the advanced certificate request page and paste the request into the ‘Saved Request’ dialog:
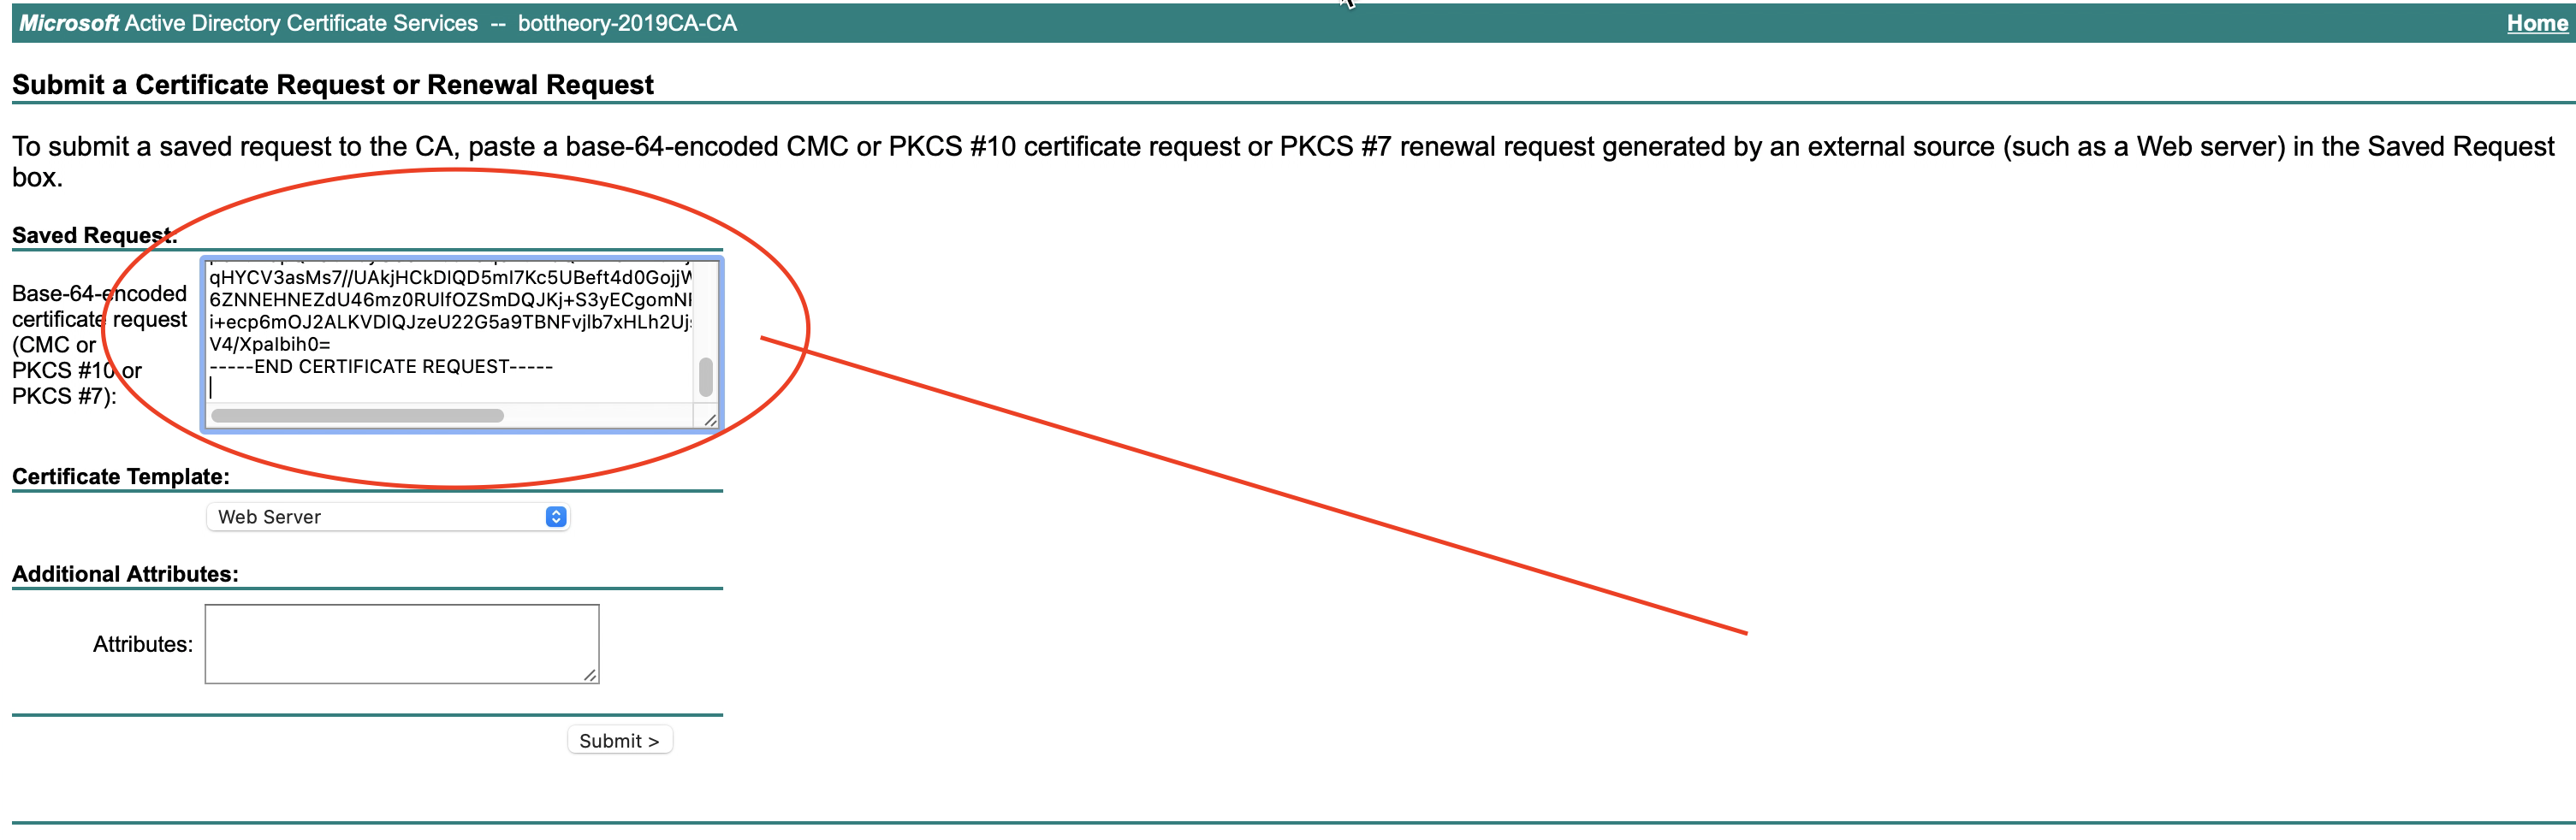
Select a template (like Web Server) from the ‘Certificate Template’ dropdown.
In order for the cert to validate correctly, some browsers or platforms (coughApplecough) require a SAN.
We just add the SAN entry to the ‘Additional Attributes’ dialog now:
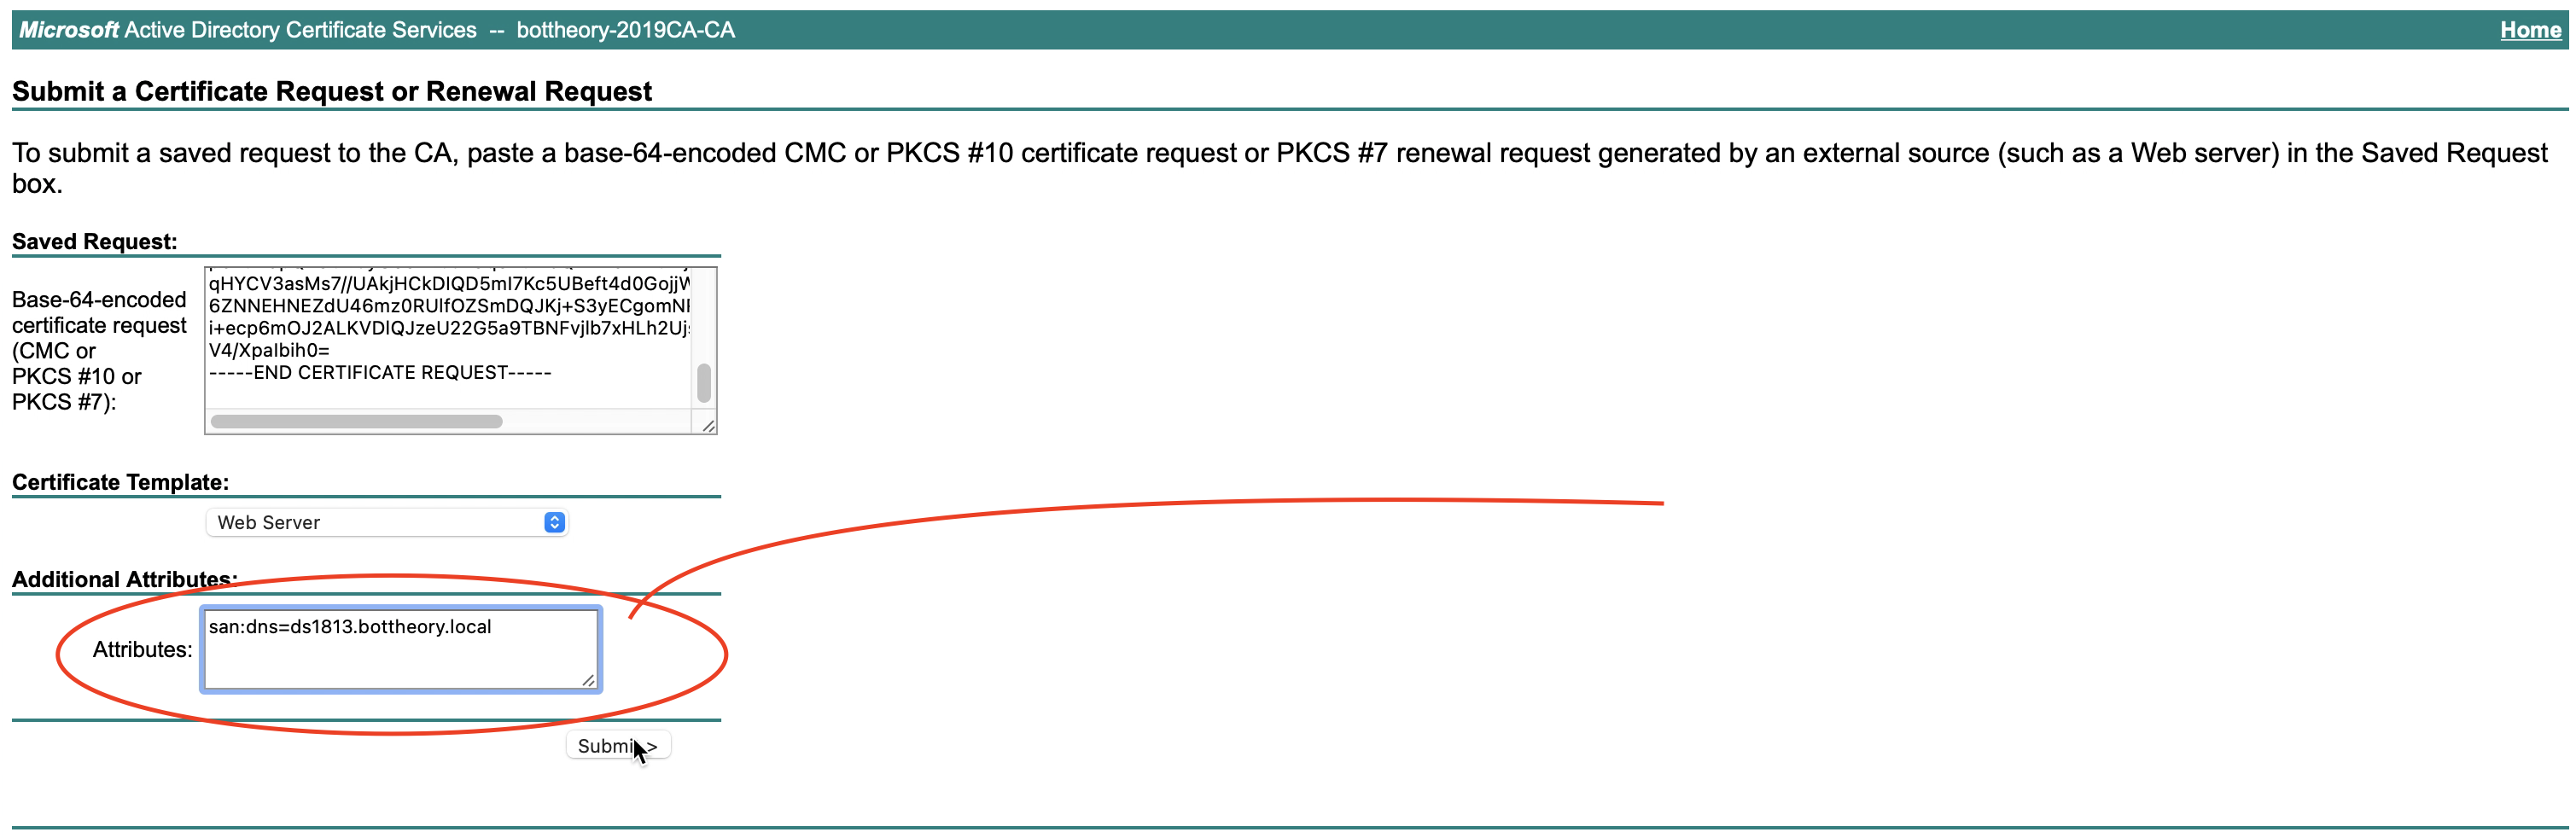
san:dns=ds1813.bottheory.local
If you have multiple servers or just want to add more dns names, you can do so by adding each name to the SAN, seperated by an ampersand and prefixed with “dns=”.
Example:
san:dns=corpdc1.fabrikam.com&dns=ldap.fabrikam.com
Once complete, click submit.
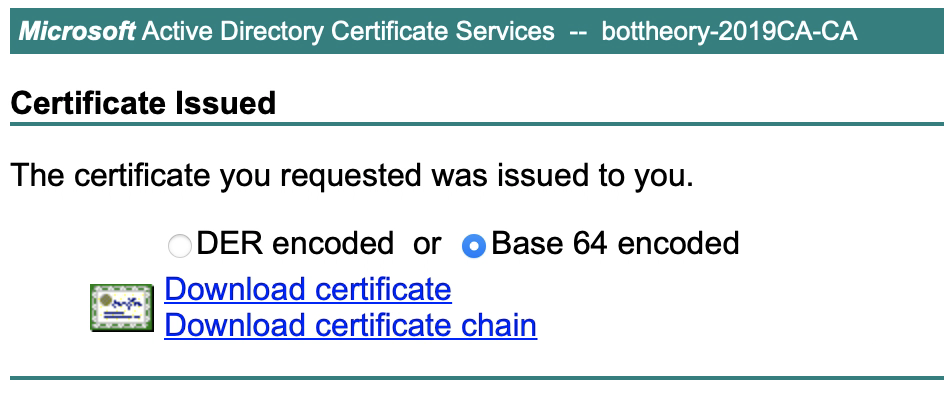
Now, download the newly issued certs as BASE64.
Go back to your Synology and go to the Control Panel, Security, Certificate and click on ‘Add’
Select ‘Add a new certificate.

Select ‘Import Certificate’ and click ‘Next’
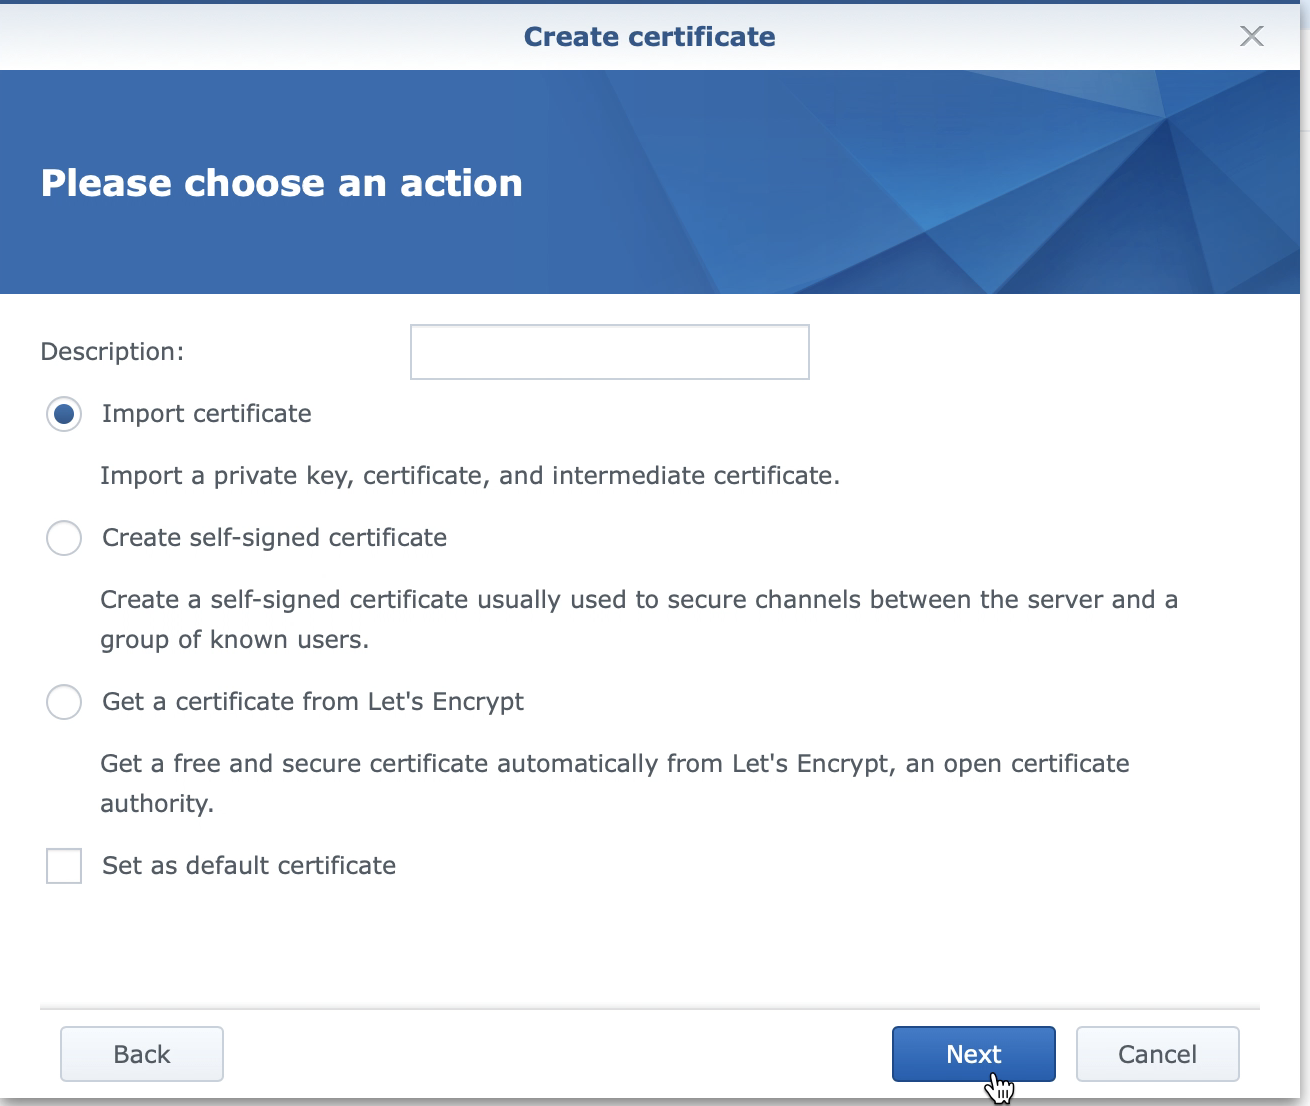
On the ‘Create Certificate’ pane, Synology is asking for 3 files. The Private Key, the certificate and any intermediate cerficates.
The Private Key is the server.key file downloaded from the archive earlier.
The certificate is the certificate (.cer) you downloaded from the MS CA earlier.
Lastly, the intermediate certificate should contain a intermediate certificate authoritay. If your Env does not have one, just ignore this line.
Click ‘OK’

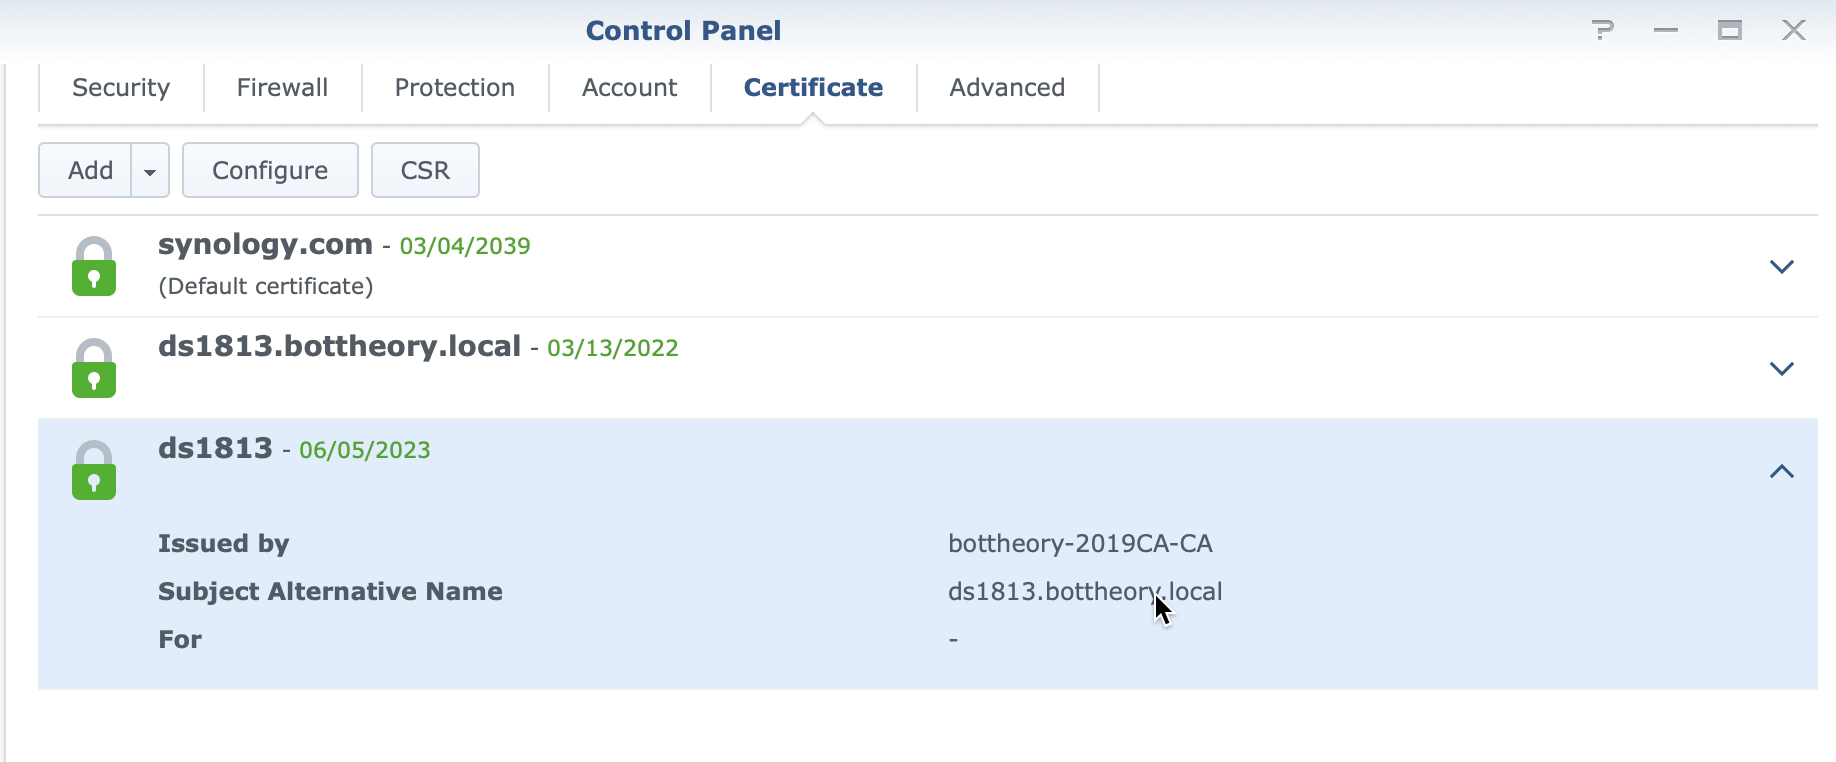
Once the certificate is imported, you can examine it. Ensure it has a SAN! The Synology web interface does show this.
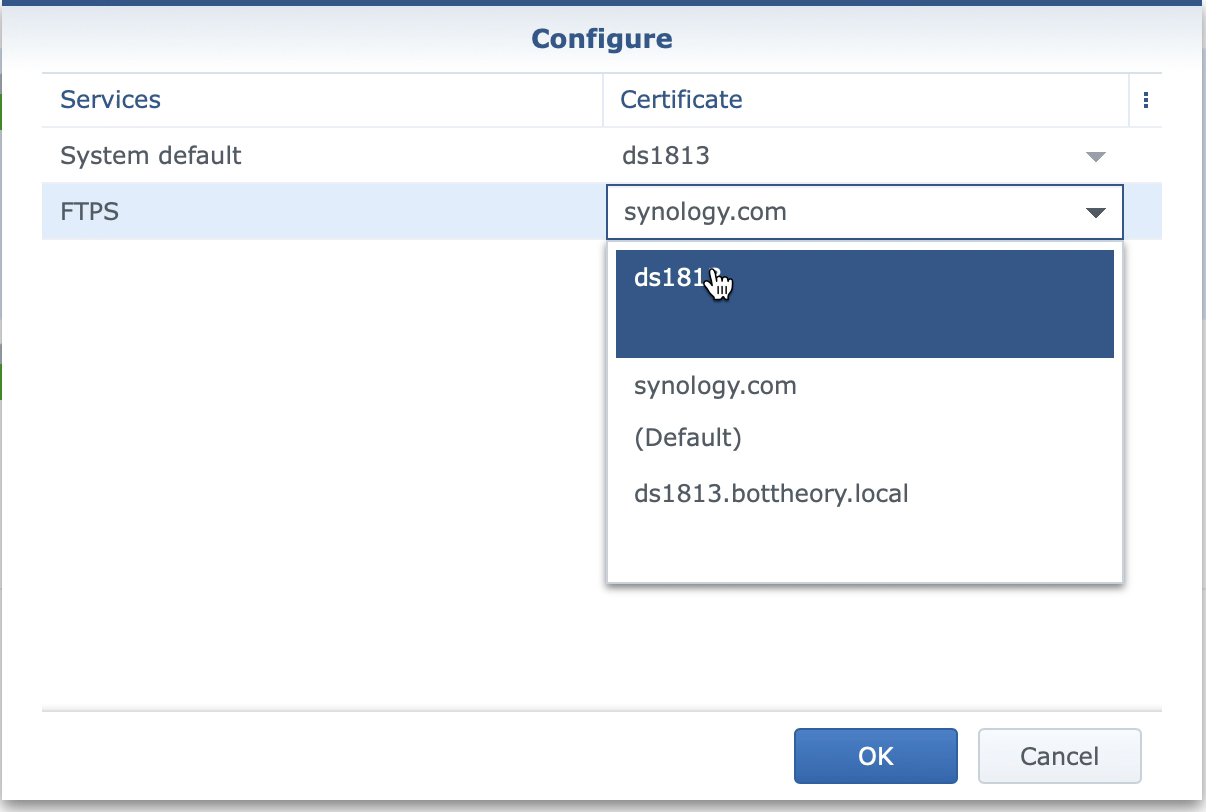
Now click “Configure” at the top of this security pane.
From here, we can configure what services use what certificate. For all services, choose the new CA we just added
And you’re done!